Who can resist taking advantage of this glorious day to check through
1) the artificial swarm hives
2) the 3 nucs.
3) the swarm gifted by A-Bee
4)the Blue hive and Yellow hive ( considering combining through paper)
Details later - must buzz-off and make up some more brood frames in anticipation!
QB
Tuesday, 1 July 2014

Tuesday, 24 June 2014
June Gap ?
There's a lazy sort of buzzing in the apiary. Nothing hectic. No hurtling around.
This, in N N'land is the June Gap. The Rowans have finished flowering. The May (aka June) blossom is over. But.....................................
We aren't short of forage. The Flowers just take a bit of finding.
Anyway, remember that your honeybees are storing up for winter now.
The 2 nucs. are bringing in pollen - a good sign that they may have reared queens. The next inspection QB will report on their progress as I plan to go through the nucs thoroughly.
Watch this space. Where's John-Bee?
This, in N N'land is the June Gap. The Rowans have finished flowering. The May (aka June) blossom is over. But.....................................
 |
| Cerinthe (Honeywort) |
 |
| Meadow Buttercup |
 |
| London Pride |
 |
| Aquilegia |
Anyway, remember that your honeybees are storing up for winter now.
The 2 nucs. are bringing in pollen - a good sign that they may have reared queens. The next inspection QB will report on their progress as I plan to go through the nucs thoroughly.
Watch this space. Where's John-Bee?
Sunday, 22 June 2014
Artificial swarm technique
QB used to get quite upset when she came home from work to find a swarm hanging from a branch ready for the "off". Then I found you could make the bees think they had swarmed. Here's how.
First, during May to (say) early July I go through each hive every 7 - 9 days (every Sunday afternoon).
This can be quick if time is short. Just looking for Q cells.
On the day I find any I carry out an "artificial swarm".
1) Move original brood and floor to the right by 2'.
2) Place a new brood box and floor in its place.
3) Find Q. in original brood. (This is when I'm pleased I marked her)
Place Q and comb in centre of new brood box. Add empty drawn or new combs either side.
NB making sure there are no queen cells on the combs.
4) Put Q excluder and supers with bees intact from original hive.
5) Leave entrance open about 2-3bee width - the foraging workers will come back to the queen.
6) Now for the original hive - 2' away.
Go through the brood box. Remove all sealed Q cells. Leave 2 or 3 unsealed Q cells ie with well-developed larvae.
7) Put on crown board and roof. I usually feed them 1:1 syrup about 6-8pints.
Close entrance to 1 bee width .
Remember there are only nurse bees/eggs/larvae in this hive so no bees on guard duty.
8) After 1 week move this hive to the left of the new (swarm) hive.
This is so any bees which are now foraging will go back to the old queen and swell the numbers
until the brood builds up.
If the queenless colony fails to rear a laying queen OR if you want to replace the old queen you can combine these 2 colonies through newspaper later.
 Old Queen marked red - when I found her I put the comb in a box to deal with later.
Then at least I know where she is!

 The left photo. shows the "swarm" hive (new box on old site) ready to receive the old queen and her retinue.
The right photo shows the "swarm"
brood box with the frame with the old queen and bees reinstated. Next add QX/supers/crownboard/roof.

This is the original hive - feeder in place as there are not yet any foraging bees to collect nectar and pollen.
Hope this is clear and not too late. Keep on BZzzzzzzzzzzzzing!!
First, during May to (say) early July I go through each hive every 7 - 9 days (every Sunday afternoon).
This can be quick if time is short. Just looking for Q cells.
On the day I find any I carry out an "artificial swarm".
1) Move original brood and floor to the right by 2'.
2) Place a new brood box and floor in its place.
3) Find Q. in original brood. (This is when I'm pleased I marked her)
Place Q and comb in centre of new brood box. Add empty drawn or new combs either side.
NB making sure there are no queen cells on the combs.
4) Put Q excluder and supers with bees intact from original hive.
5) Leave entrance open about 2-3bee width - the foraging workers will come back to the queen.
6) Now for the original hive - 2' away.
Go through the brood box. Remove all sealed Q cells. Leave 2 or 3 unsealed Q cells ie with well-developed larvae.
7) Put on crown board and roof. I usually feed them 1:1 syrup about 6-8pints.
Close entrance to 1 bee width .
Remember there are only nurse bees/eggs/larvae in this hive so no bees on guard duty.
8) After 1 week move this hive to the left of the new (swarm) hive.
This is so any bees which are now foraging will go back to the old queen and swell the numbers
until the brood builds up.
If the queenless colony fails to rear a laying queen OR if you want to replace the old queen you can combine these 2 colonies through newspaper later.
Then at least I know where she is!
The left photo. shows the "swarm" hive (new box on old site) ready to receive the old queen and her retinue.The right photo shows the "swarm"
brood box with the frame with the old queen and bees reinstated. Next add QX/supers/crownboard/roof.
This is the original hive - feeder in place as there are not yet any foraging bees to collect nectar and pollen.
Hope this is clear and not too late. Keep on BZzzzzzzzzzzzzing!!
Wednesday, 18 June 2014
Much too hot to work with bees .... but...
QB hasn't been able to inspect the bees properly for a week or more. Plenty of time for my White Hive colony to plot some mischief. This is my strongest colony and I will expect to see at least some queen cells with larvae and royal jelly. Sure enough on combs 2 & 3 there are 3 Q. cells (not sealed fortunately!) hanging along the top bars. This usually indicates supersedure of an old queen. Their queen, who I haven't been able to see/mark, is 2013.
On comb 4 there she is. A beauty - large and black. I always have the marking cage and pen ready so
managed to put a bright red spot on her thorax (as well as on several workerbee attendants!)
It was becoming quite obvious that an Artificial Swarm was necessary.
How I did it and pics. too will be in tomorrow's blog.
QB dashing off to water the garden.
QBZZZZzzzzzzzzzzzzzzzzzzzzzzzzzzzz
On comb 4 there she is. A beauty - large and black. I always have the marking cage and pen ready so
managed to put a bright red spot on her thorax (as well as on several workerbee attendants!)
It was becoming quite obvious that an Artificial Swarm was necessary.
How I did it and pics. too will be in tomorrow's blog.
QB dashing off to water the garden.
QBZZZZzzzzzzzzzzzzzzzzzzzzzzzzzzzz
Sunday, 1 June 2014
Solar wax extractor - don't waste your wax.
The solar wax melter is working overtime today.
 I collect every bit of wax - old comb, scrapings off QX and top/bottom bars etc.
Throughout the summer these bits get thrown into the extractor which has a perforated zinc screen. The wax melts and the bits of debris get left behind. Some beekeepers put the wax bits in an old pair of tights and we know someone who puts them in old pyjama legs! Scary!!
The resulting wax can be kept in the freezer if you haven't time to deal with it.
The box is stored away in the winter and the wax can be used for candles, polish, cosmetics etc. but it may need a bit more filtering through muslin to get it absolutely pure.
You can make it into blocks and trade it in exchange for sheets of foundation from your supplier.
The pic. shows some of last year's wax (1kg)- several different colours depending on where the bees have been foraging.
Quite a nice piece of modern art don't you think?
QBZzzzzzzzzzzzz
I collect every bit of wax - old comb, scrapings off QX and top/bottom bars etc.Throughout the summer these bits get thrown into the extractor which has a perforated zinc screen. The wax melts and the bits of debris get left behind. Some beekeepers put the wax bits in an old pair of tights and we know someone who puts them in old pyjama legs! Scary!!
The resulting wax can be kept in the freezer if you haven't time to deal with it.
 |
| This is what you get at the end of the summer. |
You can make it into blocks and trade it in exchange for sheets of foundation from your supplier.
The pic. shows some of last year's wax (1kg)- several different colours depending on where the bees have been foraging.
Quite a nice piece of modern art don't you think?
QBZzzzzzzzzzzzz
Saturday, 31 May 2014
New Kids in the Apiary
We have 2 nucs. set up by a friend whose bees made a lot of very nice Q. cells.
My apiary is the "stud", with my drones being around when the 2 virgins hatch. We're keeping the black-bee strain as pure as possible.

We put the nucs. on old WBC floors to lift them off the ground.
Also we have kept the entrance tp 2 bee-width. The colonies will not be strong enough yet to defend their stores. We don't want to risk robbing.
Each nuc. has 5 drawn combs. 2 outer with honey and pollen; 3 with eggs and brood - the middle one with the precious Q cell. If all works out the Q's will hatch/ mate/ start laying after 2 weeks.
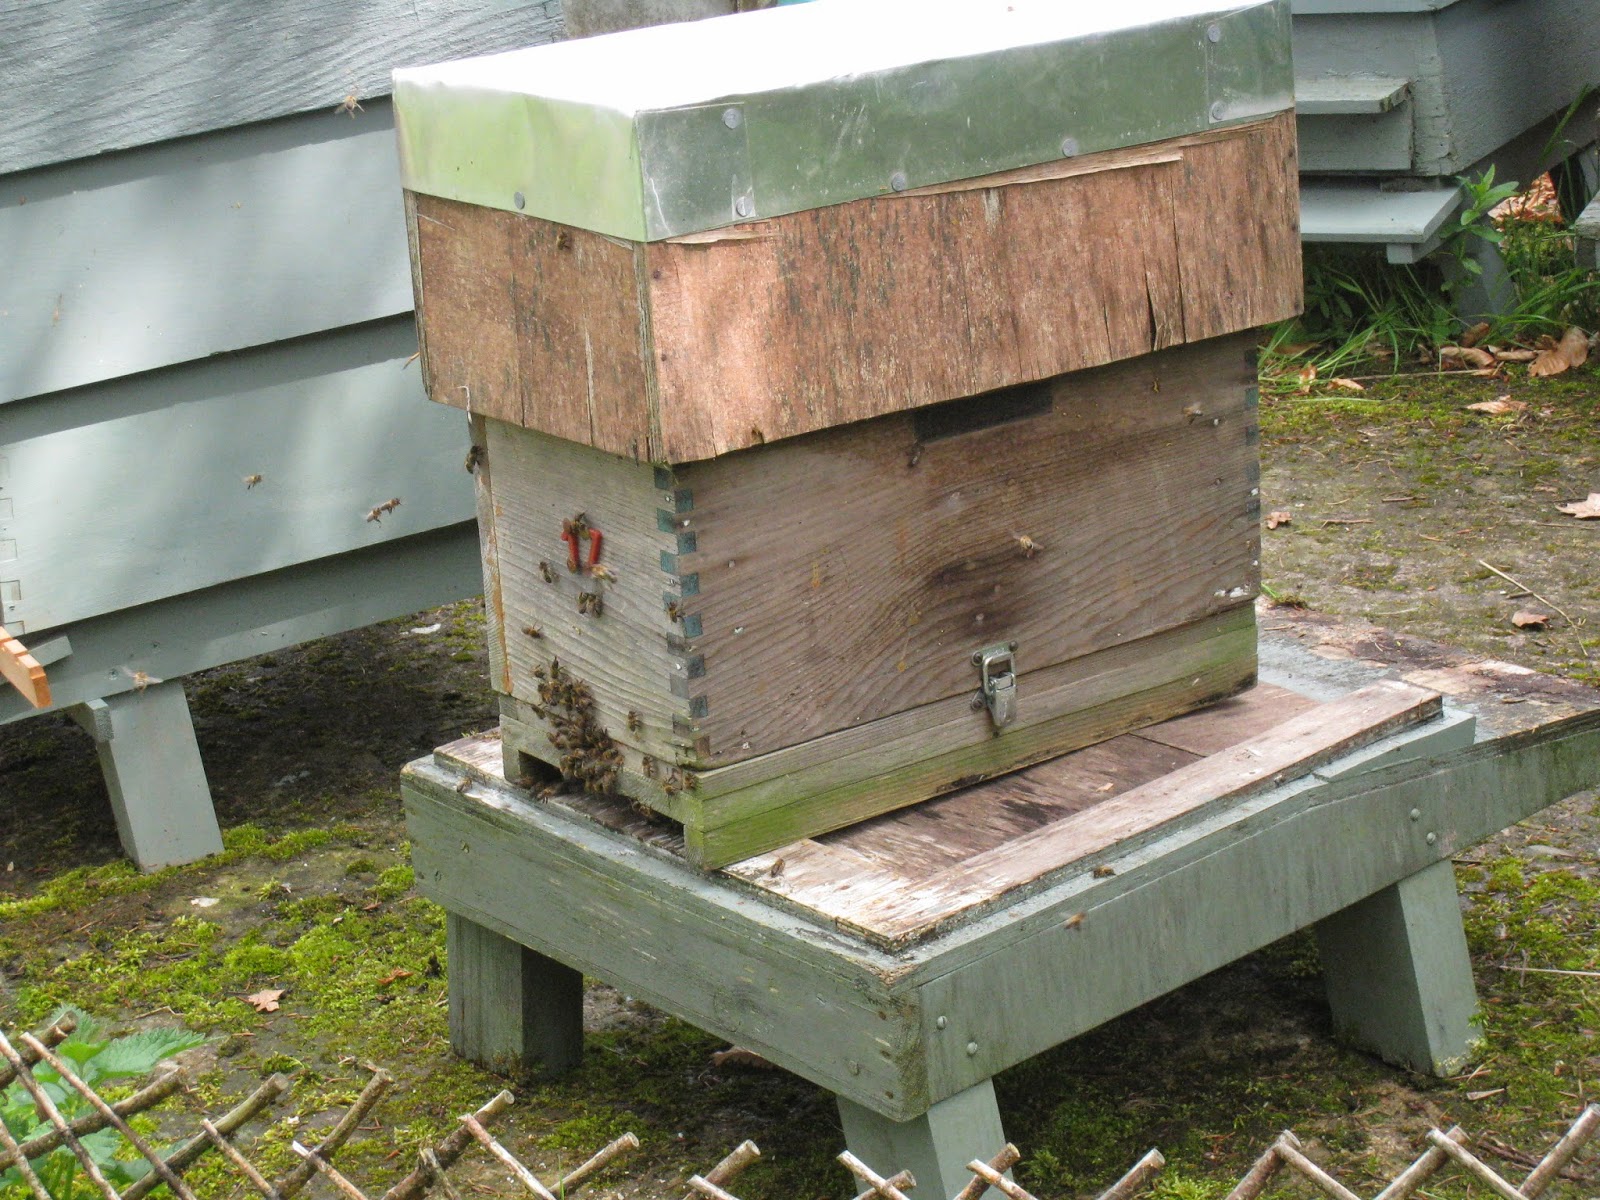 This is a good way to do an artificial swarm if you're a bit short of equipment.
The day is too nice to waste indoors so I'm off outside.
I will not be even taking a little peek inside the nucs.Tempting though it is.
QB will be back later with a report on today's adventures in Beeland.
QBZzzzzzzzzzzzzzz
My apiary is the "stud", with my drones being around when the 2 virgins hatch. We're keeping the black-bee strain as pure as possible.
We put the nucs. on old WBC floors to lift them off the ground.
Also we have kept the entrance tp 2 bee-width. The colonies will not be strong enough yet to defend their stores. We don't want to risk robbing.
Each nuc. has 5 drawn combs. 2 outer with honey and pollen; 3 with eggs and brood - the middle one with the precious Q cell. If all works out the Q's will hatch/ mate/ start laying after 2 weeks.
The day is too nice to waste indoors so I'm off outside.
I will not be even taking a little peek inside the nucs.Tempting though it is.
QB will be back later with a report on today's adventures in Beeland.
QBZzzzzzzzzzzzzzz
Monday, 19 May 2014
MidMay Inspection (using cloths)

This is Cerinthe - or Virgil's Honeywort. The purple 'petals' are bracts.
These flowers are rich in nectar and are very attractive to all species of bee - esp. bumblebees.
This picture shows the open "Blue" hive using canvas cloths to keep the bees from flying around upsetting the rest of the hives

 |
| Using 2 cloths which you roll / unroll to expose 1 frame at a time. |

Any questions? Add to "Comment" at the end of this post.
All hives had masses of stored pollen in the outer frames - a sign that the workers are ahead of the Queen?

 |
| Add caption |
Time to roll up the cloths making sure no little (inexperienced) youngsters have got trapped.
Hope your day was as good as mine. QBzzzzzzzzzzzzzzzz
Subscribe to:
Posts (Atom)